The saddle that saves your trip
— or the one that ends it early.
On day five of the Tuscany Trail, halfway up a gravel climb in the hills around Grosseto, I knew something was wrong. It was not the bike. It was not the weight of the bags. It was me — or more precisely, it was the way I had been sitting on that saddle for almost 400 kilometers, eight hours a day.
I could still pedal. But every rough section of trail had turned into a negotiation with pain. That evening I slept on my side, hoping the night would fix what I had failed to prevent in the weeks before the start. It did not.
The contact point nobody thinks about enough
When people talk about bikepacking gear, they spend hours choosing the right bags, weighing every gram of their sleeping system, arguing about tires and drivetrains. The saddle almost always comes last — treated like an accessory, not a critical piece of equipment.
But the truth is simple: your body has only three contact points with the bike. Your hands on the bars. Your feet on the pedals. And your sit bones on the saddle. Get any one of these wrong and your trip changes shape — often for good.
The saddle is the most treacherous of the three. You can change gloves, loosen your shoes. But the wrong saddle works quietly, day after day, until one morning you climb out of your tent and realize something is no longer right.
The wrong saddle does not stop you on day one. It destroys you on day four.
First rule: your saddle is not someone else’s saddle
There is one mistake that almost everyone makes at least once: buying the saddle that worked for someone else. A friend who finished The Grand Escape without a scratch. A YouTube video where someone swears that model is the only saddle worth buying. An enthusiastic review on a forum.
The problem is anatomical, and there is no way around it. Every person has a different shape and width of sit bones — the two bony structures in your pelvis that carry your weight when you are seated. A saddle built for a narrow pelvis placed on a wide pelvis is a torture device. And the other way around.
Before you look at any model, any material, any price: you need to know your measurement. And you can do it at home, right now, for free.
Take a piece of corrugated cardboard — the thicker and stiffer, the better. Place it on a hard chair. Sit on it in tight clothing or without, lean slightly forward as if you were on a bike, and push your sit bones down as hard as you can. Stand up slowly, and you will see two clear impressions in the cardboard. Measure the distance between the centers of those two marks. That number, in millimeters, is where everything starts.
This is not a minor detail. It is the foundation. When you go to configure a saddle on a site like Selle San Marco, the first thing they ask you is exactly this. They ask because their saddles are built in different widths — and the right width is not optional. It is the minimum condition for the saddle to actually work for you.
The bike fitter: the smartest money you will spend
There is one thing that separates bikepackers who suffer from those who no longer do. It is not the four-hundred-euro saddle. It is not the miracle cream. It is an appointment with a bike fitter.
Not a physiotherapist. Not a knowledgeable mechanic friend. A professional who can read your position on the bike — the length of your femur, the mobility of your ankle, the angle of your pelvis — and translate all of it into three numbers: saddle height, setback, tilt.
These three parameters cannot be copied from a guide on the internet. Your ideal position is unique, and it is different from everyone else’s. A saddle two centimeters too high does not hurt on day one. It quietly wears down your knee, and the pain arrives when you are in the middle of nowhere on day six, far from any mechanic or physio.
A session with a good bike fitter costs between 100 and 200 euros. That is less than you spend on food in one week of bikepacking — and it stays with you for years.
The return on that investment is real: you sit more comfortably, pedal more efficiently, use less energy, and arrive in the evening with something left in your legs. And a good fitter will often help you understand which saddle shape suits your position best. That is where the whole picture comes together.
Bikepacking saddles exist. Use them.
Ten years ago, people doing touring and bikepacking used whatever they had. Road cycling saddles were the most common option, and you adapted — or you suffered quietly. Today there is no excuse for that anymore.
There are saddles designed specifically for people who spend 8, 10, 12 hours a day on a loaded bike. They are not generic endurance saddles. They are tools built for a specific position — more upright, more static than a race position — and for a kind of use that road saddles were never designed to handle: continuous pressure on the same spot, every day, for weeks.
The difference from a road saddle is in the geometry, the padding distribution, the shape of the center channel. This is not marketing. It is engineering applied to a real problem.
Selle San Marco has been working on this for years. The difference between one of their long-distance models and a generic shop saddle becomes clear after day three — not day one. That is exactly why so many people underestimate it until they have felt it themselves.
And once you find the right saddle, you take it with you from bike to bike. It moves with you, not against you.
The combination that actually solves it — for real
Here is what bikepackers with real mileage know, and what beginners learn the hard way: the right saddle alone is not enough. It only works as part of a system.
The saddle. Matched to your sit bone width, built for long hours, set up correctly after your bike fit. This is the starting point.
The shorts. Not just any shorts with a thin race chamois. A chamois designed for endurance: real padding, antibacterial properties, materials that handle hours of sweat without causing irritation. The saddle-plus-shorts combination matters more than either piece on its own. Most people figure this out too late.
The cream. Before you ride. And again in the evening after you have cleaned up. This is not a luxury. It is what eliminates friction, prevents saddle sores, and keeps your skin intact over weeks of riding. The ones we use:
→ Before riding: https://www.assos.com/it/chamois-creme-75ml-18965.html
→ After riding: https://www.assos.com/it/skin-repair-gel-evo-75-ml-18973.html
These three things together change everything. That is not an exaggeration — they remove the problem at its root. After years of long trips, since I started using this system I have not had a single day ruined by saddle issues.
The stops: the most underrated tool you have
There is one habit that separates people who suffer from people who do not, and it is almost embarrassing how simple it is: get off the saddle every hour. Even just for five minutes. Drink some water, look at the landscape, take a few steps. You do not need to stretch. You do not need to do anything special. You just need to break the continuous pressure.
The human body is not built to hold the same position for six hours straight. Rest stops are not a concession to tiredness — they are active maintenance. Experienced bikepackers know this and plan for it. Beginners discover it after the damage is already done.
If your midday stop is a long one, it is worth cleaning the contact area with intimate wet wipes and reapplying the cream. Very few people do this. Almost everyone who tries it once keeps doing it forever.
The conversation nobody wants to have — but you need to have
Let us talk about body hair. I know it is not the most elegant topic, but ignoring it has real consequences, and anyone who has done a few long trips already knows this.
Hair in the contact zone creates friction against the chamois. This is not about aesthetics — it is physics. Every pedal stroke moves the fabric, and if there is hair in between, that hair pulls. The follicle gets inflamed. The skin gets irritated. What felt like a minor annoyance in the morning becomes a serious problem by the afternoon.
The answer is not shaving everything off, though. Anyone who has made that mistake knows what happens next: regrowth is far worse than the original problem. Short, stiff hair against a chamois for ten hours a day is a nightmare.
The right answer is somewhere in the middle: trim, do not remove. If you have a particularly generous amount of hair in that area, reduce it with scissors. Enough to eliminate excess friction, not enough to trigger aggressive regrowth. Once you know what you are trying to do, the balance is easy to find.
And in the evening, after washing and applying your cream: sleep without underwear. Let the skin breathe. Let the cream absorb fully. That single habit, night after night, makes a bigger difference than you would expect.
Do not rush this decision
A new saddle needs real testing — not two rides on the weekend. Take it on a three-day trip before trusting it for a month-long journey. You are not trying to find out if it hurts right away. You are trying to find out if it works over time — and those are two very different questions.
Your body adapts. But even the wrong saddle can feel acceptable for the first couple of days, and only show its true nature once fatigue has built up. Giving yourself enough time to test is the only way to know for sure.
The good news — the real good news — is this: with your sit bone measurement in hand, a session with a bike fitter, a saddle built for long hours, the right shorts, and the right cream, the saddle problem is solved. Not managed. Solved.
You do not have to arrive at day four and realize you got something wrong. You can arrive there with tired legs and a smile — which is exactly why we do this.
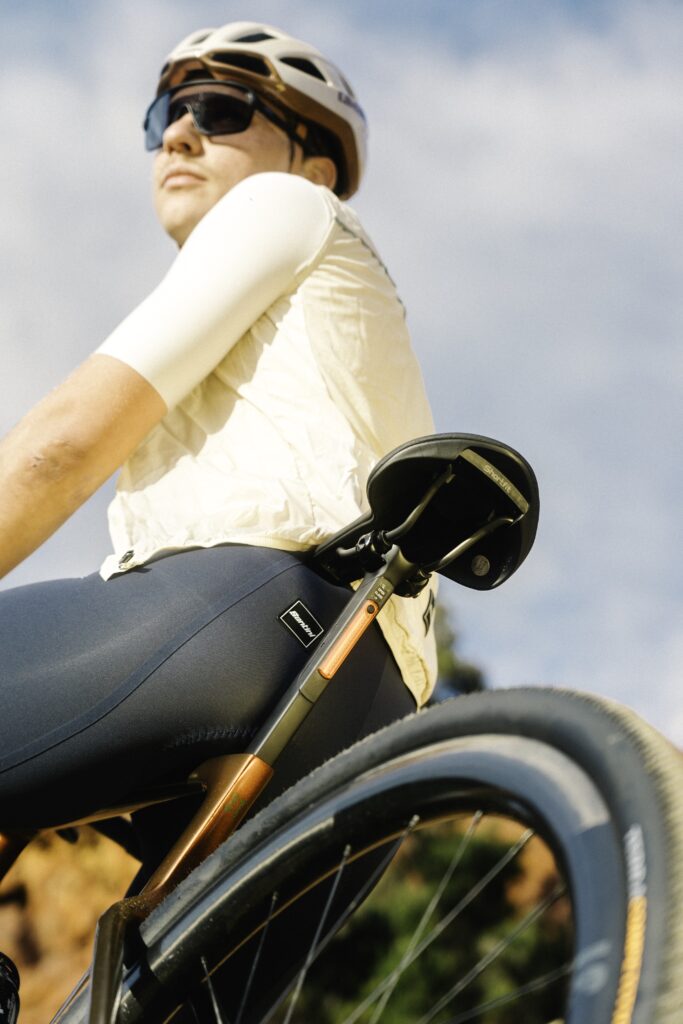
The saddle we use — the one that got us through the Tuscany Trail and the NorthCape4000 without a single issue — is the Selle San Marco Shortfit 2.0 Shield Supercomfort Racing:
→ https://it.sellesanmarco.com/shortfit-2-0-shield-supercomfort-racing/
If you do not know where to start, start there.
MAURO COSTOLONI
2 months agoottime indicazioni
grazie
Add comment